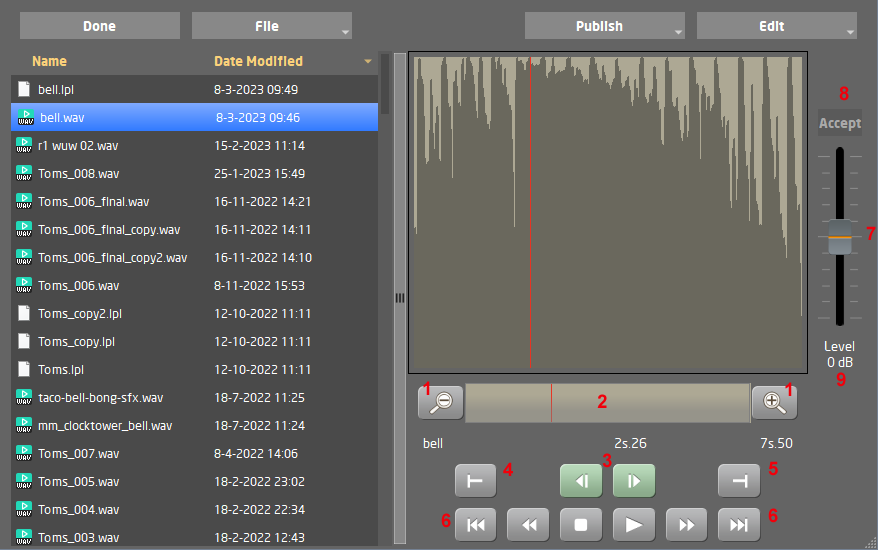
You can zoom in (1) and out. Set markers Left and Right to define the beginning and ending. You can drag using the scroll bar (2) to the desired location of the recording. To fine adjust you can use the two buttons (3). By pressing the set marker left button (4), the playback starting time will be set.
To define a different end of recording position, set the score cursor to the desired position and press the set marker right / end selection button (5).
Use (6) to move the cursor to the begin / end of the file or selected area. The selected area will be highlighted in the waveform screen and only this part of the file will be published or played. You can publish the selection you made with FTP, or Render it to another file.
The level of the selected audio can be raised / lowered (7) in steps of 1dB . You need to press Accept (8) to apply it to the file. With (9) you can see the set level or set it to 0dB by pressing.
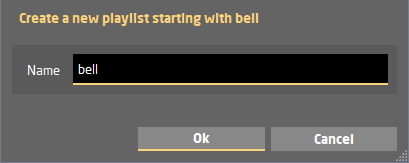
To add more recordings you can Create playlist. At creating you can define a name for the list. The current recording will be the first recording in the play list.
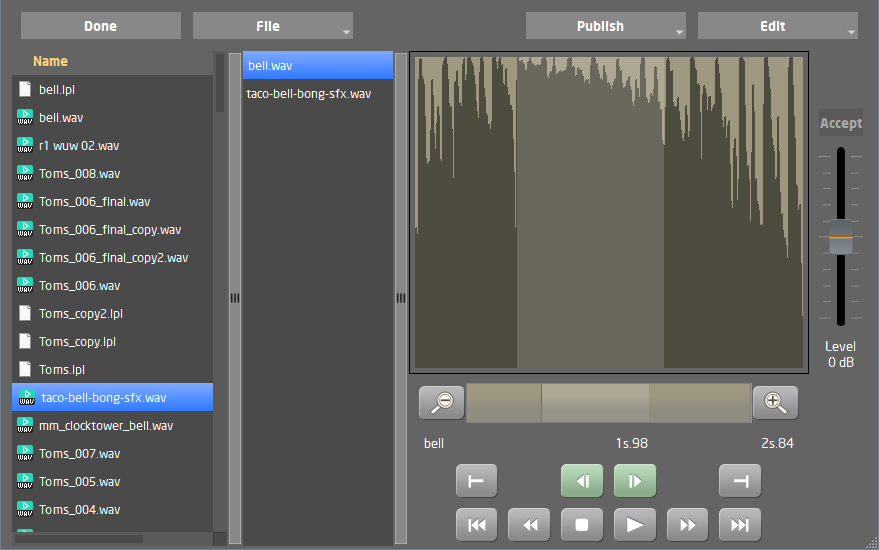 You can add more recording files to the list by dragging them to the play list, and play them or only parts of the recordings after each other. Drag the files to another position or remove them from the list.
This playlist can be selected to be played during your stream session, or you can publish it through FTP or Render it to another file.
File
File related buttons ar now all in the File menu: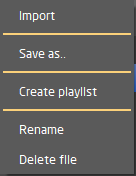
Import: Import other audio files such as mp2/mp3/mus into the Recording Directory. The files will be converted to standard WAV format.
Save as..: Save the file under another name. Do this before editing if you do not want to change the original file.
Create Playlist: For making a list of recordings, to be played after each other.
Rename: Rename the file.
Delete file: Delete the file.
Publish
Only the selected audio will be published with these functions. A playlist will be rendered first into one audio file with the sequential audio clips.

FTP: use the File Transfer tool to send it to a FTP server.
DigaMailbox: Send the Audio clip to a Diga Mailbox.
Render: Render the file into another file
Edit
The new Edit button gives you extra edit options: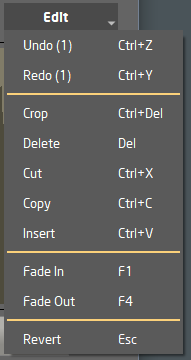
Crop : will take only the part between the left and right marker, deleting the rest.
Delete : will delete the part between the left and right marker.
Cut : will take out the part between the left and right marker, saving it in the copy buffer.
Copy : will copy the part between the left and right marker in the copy buffer.
Insert : will insert the copy buffer at the cursor location.
Fade In : will make a fade in from the left tot the right marker.
Fade Out : will make a fade out from the left tot the right marker.
Undo(x) : you can undo all operations one by one (x = number of undo steps left )
Redo(x) : or Redo them again (x = number of redo steps left ).
Revert : this will cancel all edit operations, reverting to the state of the original audio file
Use Done to go back to the main screen.

