The Options tab enables you to switch On the display of several features of the ‘Go Live’ tool in LUCI Studio. In addition you can also switch on and off some options concerning the behaviour of LUCI
Studio.
View
Switch on and off some features in the ‘Go Live’ tool.
Max. Recording time
Show the maximum recording time available
Battery-state
Show the battery-state
Digital gain knob
Show a gain knob in order to adjust the gain of the input.
Output Volume knob
Show an output volume knob in order to adjust the output level.
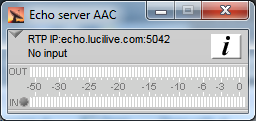
Server View
 Show the main Go Live tool in a minimal size. This is useful if you have many different instances running on your PC.
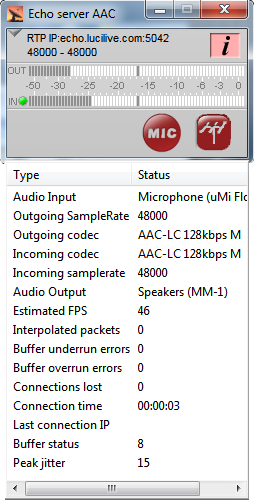
Show Status
 Enable the display of a status Window in the main program. Press the I button to show it when you are in Server View.
Menu Bar
Show the standard Windows menu bar or a minimized arrow you can click to show the menu-items.
 Allow multiple instances
If you purchased the possibility to use multiple servers on the same PC, you can enable this. You can also see how many you have purchased.
Go Live
Check this and LUCI Studio will go on air immediately after starting up
Try to minimize I/O cross-talk
If you experience cross-talk of the return-channel into the signal that is broadcast, tick this. LUCI will then try to reduce this. This only works when an external microphone is connected.
Button-guard
If you enable this, LUCI Studio will ask you for confirmation when you want to stop the live-stream.
Time out as a server
If you have LUCI configured as a server (listen to incoming streams) you use this setting to set the time LUCI will keep sending the return stream before it stops and starts listening to incoming streams again.
Logging Level
Here you can set LUCI Studio to log what it’s doing, for debugging purposes. If you experience any problems, set this to Normal and LUCI will write a file called lucilog.txt in the folder c://user/you/appdata/roaming/lucilive2/ or in the folder where you started LUCI Studio. Send this file to our support center and also include live2ini.sup from the same folder so we can see what your settings are.
Net Interface
Choose the network card you want to use
Error signalling
This group of options is for the Multicast Rcv protocol, it enables you to define the fail-over conditions:
- No audio trigger level: if incoming audio-level from the network is below the specified threshold it is considered as No audio.
- No audio trigger period: the period that the No audio level must be detected before an error conditions is signaled.
- Restored audio trigger period: the period that the audio must be present before the error condition is signaled as solved.
- Repeat notifications fast period: after an error condition LUCI will send SNMP traps at a fast rate, you set the rate here.
- Number of fast notifications: the number of fast notifications to send before a slow rate is used.
- Repeat notifications slow period: you set the slow notification period here.
