LUCI Subscribe Max can be setup to stream Video, captured from the phone camera(s). The currently supported format is H264 with bitrates up to 4Mbps. The video can be recorded separately in an mp4 file, and combined with the separately recorded audio file with standard video editing software or our “FTP” function.
To setup LUCI Subscribe Max stream Video please follow the following guide:
Select Video Input
 First Setup the video input by selecting the settings menu item Choose Camera.
The window will show the available device cameras. Select the camera, and the default Resolution and Frame rate of this device.
Set the Station profile to stream video
 Protocol
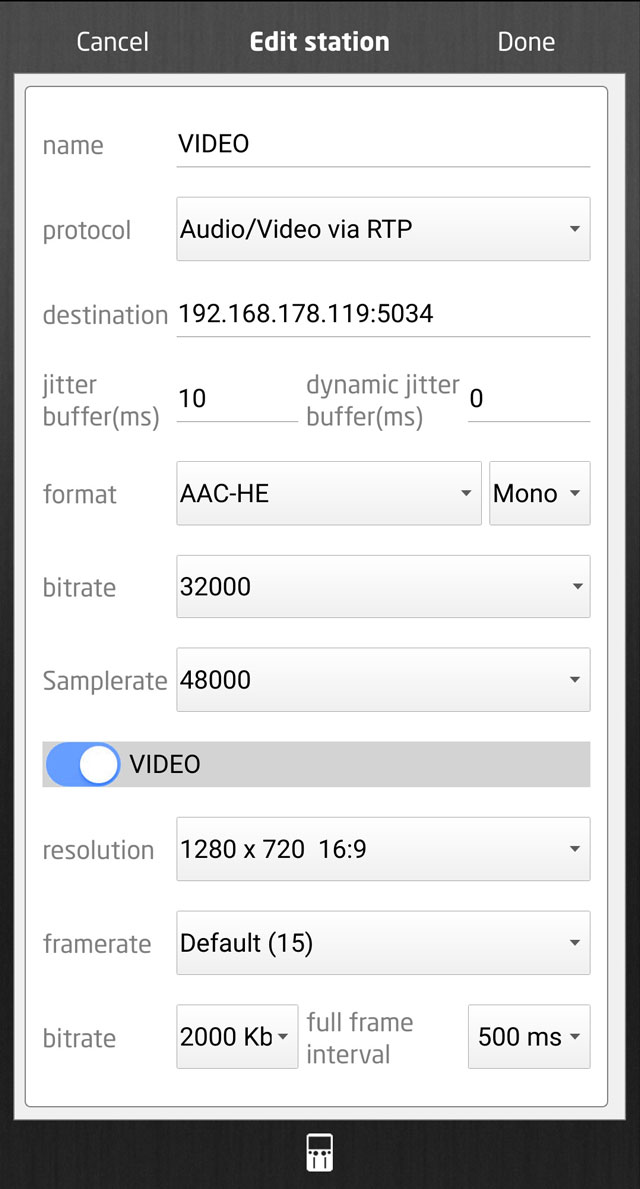
The only difference to a normal Audio profile is that you select the Audio/Video via RTP or Audio/Video via SC-RTP . This will stream the video signal through a second RTP stream on a different port (the audio port + 2):
destination
The audio-port, in this example 5034, will be used for Audio. A second port (the audio-port + 2) will be used for Video. For this example the Video port will be 5036.
The numbering of the Video -port is selected internally in the software as always being 2 more than the Audio-port. Be sure this port is also port-forwarded in your router ( see LUCI STUDIO How-To: UDP port forwarding for RTP incoming stream ).
format
There is no restriction to the Audio Output formats as this is send through a different stream. All Audio formats can be used in combination with the Video option.
Video
To stream video select this option, to set the desired resolution, frame rate… The settings chosen here depends on the capabilities of the receiving end, and can therefore differ per station.
resolution
The number of pixels ( points ) a video frame (picture ) is made up. The first number defines the horizontal pixels, the second the vertical. The default resolution is the one set in the above Video input window. If your receiving end is not capable of receiving this resolution, you an select a different one.
framerate
The number of frames (pictures) per second that is send. The higher the frame rate the smoother the transitions will be. The default frame rate is the one set in the above Video input window. If your receiving end is not capable of receiving this frame rate, you an select a different one.
bitrate
The number of video data bits per second that is send through the internet channel. The higher the bitrate the better the video quality, but your internet connection has to be able to handle this amount of data.
full frame interval
The h264 compression algorithm sends at every interval the data of one full frame ( picture ), and after that only the differences to the previous frame. If the interval is short, more data has to be send, but when the interval is long, any streaming error will result in a longer time of faulty video.
Showing the incoming video
When the Video Checkbox in the Stations profile is selected, the main screen flips into video mode; The main window of the LUCI Subscribe Max application switched to landscape view.
On pressing the Microphone button, the camera preview is shown. When pressing the Connect Button, the audio and video will be send by separate RTP streams.
The Main Interface OFF
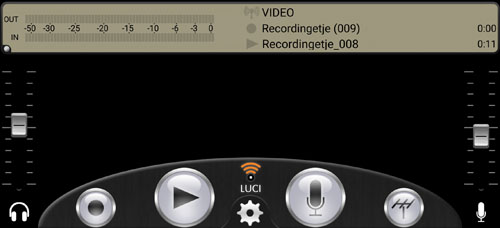 The picture shows the user interface of the LUCI Subscribe Max Video application when the camera is not switched ON.
The utility of the main user interface is equal to the Audio-only version, the explanation can be found in the Manual for LUCI Subscribe – Android.
The Main Interface ON
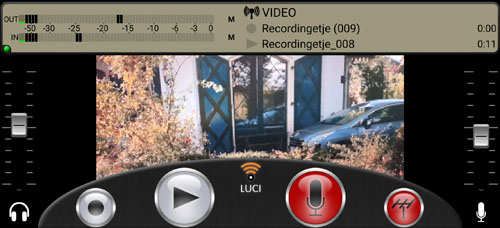 The picture shows the user interface of the LUCI Subscribe Max Video application when the camera is switched ON and the connection is established with the station.
• The Antenna button indicates the connection is established.
• The Mic button indicates the camera + microphone are ON.
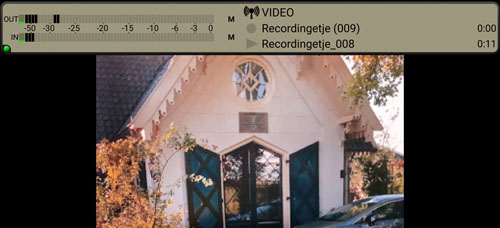 After two seconds during recording / transmission the control bar of the LUCI Subscribe Max application will disappear. This will give the user a better view of the recording screen. To activate the control bar, just tap on the main screen.
Recording the video
The video input can be recorded just as the audio into separate files. The audio in a wav file and the video in a mp4 ( audio less ) file. To combine the 2 files you can either use a 3e party Video Editing Suite, or use our FTP function.
Editing the video
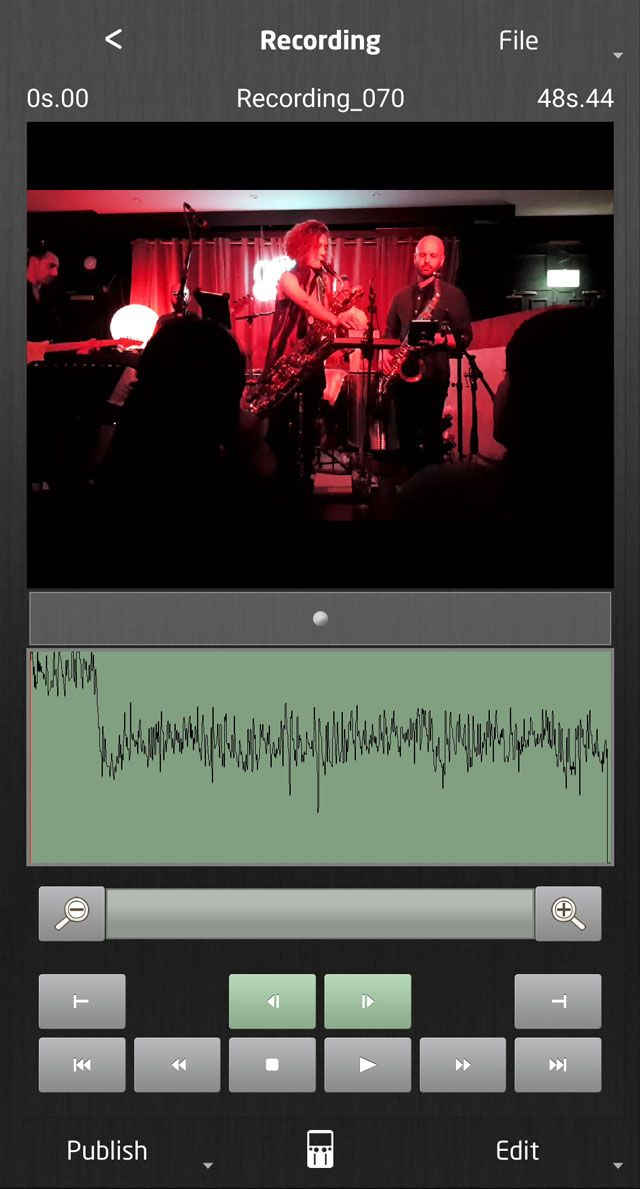 Audio and video are saved in 2 separate files. To combine the 2 files you can either use a 3e party Video Editing Suite, or publish it using our “FTP”, “Share” or “Render” function. Before publish the file you can set a start and end point with the LUCI Subscribe Max Editor. When using “FTP”the new audio file and a video with the audio combined are send to the FTP server. When using “Render” a new audio file is created with a video combined with the audio is created ( auto named “_final” ). When using “Share” the video combined with the audio file is send (auto named with timestamp ).
There is a dragging bars between the video and audio area you can move to size the video / audio areas. You can set a different begin and end point from the audio timeline ( see section “Audio Editor”). The selected area will be highlighted in the waveform screen and only this part of the file will be published. You can publish this selection with “FTP”.
Synchronisation problems
A known difficulty is the synchronization of the audio and video streams / files. As they are captured separately, the synchronisation depends on the capturing latency of the audio versus the video frames and can cause some unwanted synchronizing delay. For instance, if you use a webcam as video input and a different audio input for audio instead of the webcams microphone, then the delay could be noticeable. Therefore it is best to use a 3th party video editor to combine the 2 separate files so you can shift the audio and video in time to synchronise it.