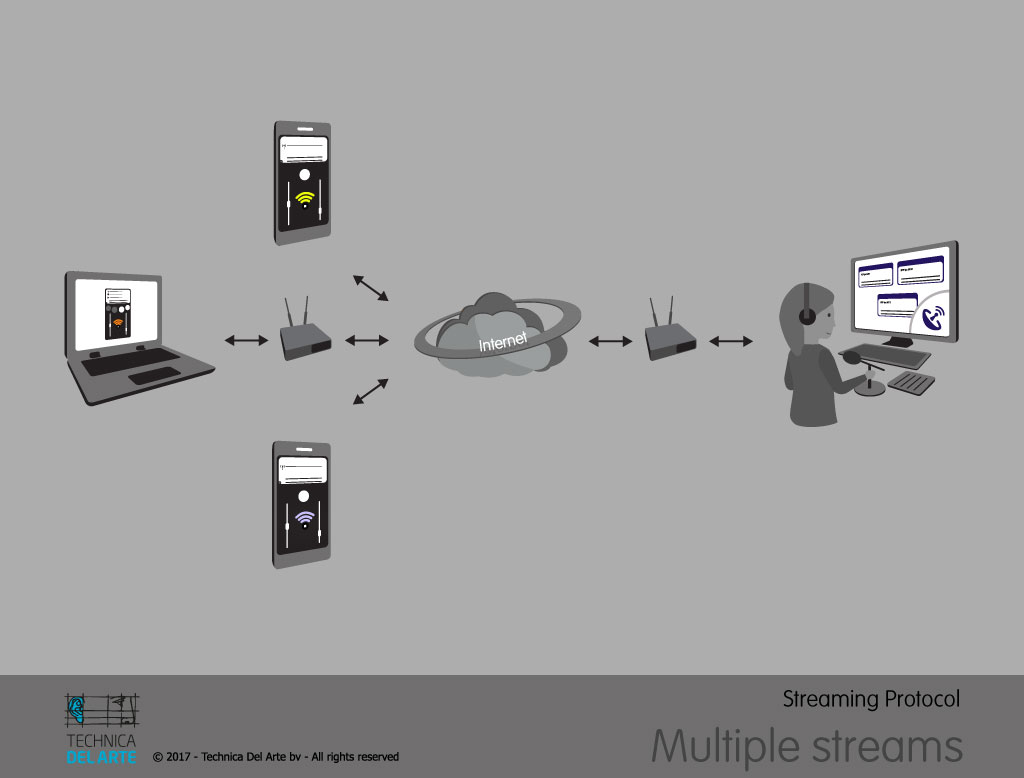
 It is possible to start LUCI STUDIO several times simultaneously on the same PC with different settings. These so-called “instances” of LUCI STUDIO enables you to receive multiple streams simultaneously. To accomplish this, please do the following.
- Install LUCI STUDIO with the standard installer from our webpages.
- Create a folder on your desktop or documents directory for instance called “LS”. If you have LUCI STUDIO on an USB stick, best to create it on the USB.
- Start LUCI STUDIO from the main menu ( or USB stick )
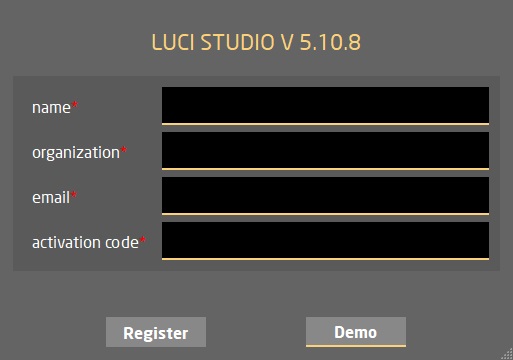
- Register your software using your activation code. If you only bought the extra stream(s), go to the “About” screen and use the “Re-Activate” function to re activate with your license code:
- Check in the About screen that the number of Instances are correct, else use the “Re-Activate” function to re activate with your license code:
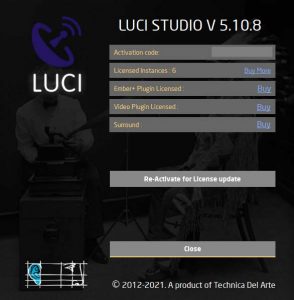
- Pressing the Link “Buy more” will direct you to the LUCI Shop “Extra Stream” page, with your activation code filled in automatically.
- Setup your LUCI STUDIO for the first stream, selecting the right Audio I/O channels, general settings, add Stations/Phonebooks, and other preferences you wish to have for every instances.
- From the main menu choose “Create Instance file” to save the current settings as an instance starting file, for example “LuciStudio-1.lsup”, in the LS folder. Any name will do, but has to have .lsup extension (dot luci setup ).
- Change the settings again in accordance with your requirements for second instance and choose menu “Create Instance file” to save it again, for example as “LuciStudio-2.lsup”, in the LS folder.
- Repeat for all instances you purchased.

When ready, quit the current LUCI STUDIO, navigate to the LS folder and double-click on each .lsup file ( dot luci setup ). Arrange the windows.
Auto start the instances
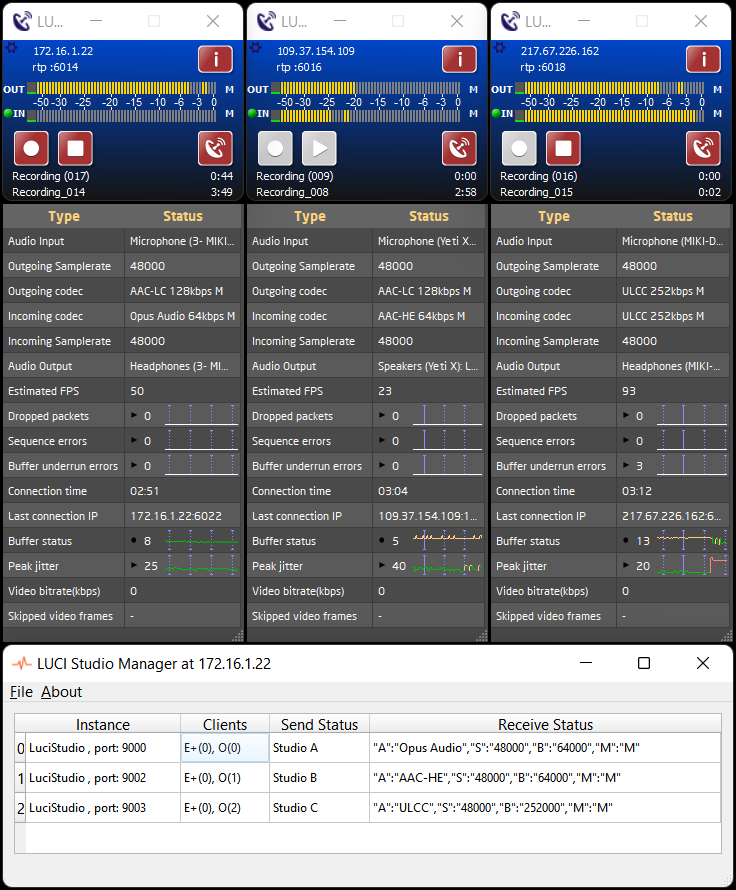
Since Version 5.10 you can make use of the LUCI STUDIO Manager to start your instances automatically and have them guarded with the watchdog funktion, restarting them if there is any problem. The manager is installed with LUCI STUDIO.
OR
You can also make a start.bat file with this content to start all lsup files with one click:
start "" "LuciStudio-1.lsup"
start "" "LuciStudio-2.lsup"
start "" "LuciStudio-3.lsup"
etc..

To start an instance on the LUCI USB drive is different. You either drag an lsup file to the LuciStudio program on the drive, or you create a shortcut to the LuciStudio program with the location of the “lsup” file on the command line.
Or, you can also make a start.bat file like this to start all files with one click:
start "" LuciStudio.exe "LuciStudio-1.lsup"
start "" LuciStudio.exe "LuciStudio-2.lsup"
start "" LuciStudio.exe "LuciStudio-3.lsup"
etc..
Starting Multiple Instances on MacOs or Linux
For MacOs and Linux systems you need to have a special batch file to start the LUCI STUDIO instances. Copy the text into a text file and change it according to your system. Finally ensure that the batch files are executable so that double clicking them will start the script. Depending on the OS you need to start a terminal app , there execute ls ~/Documents/ to go the directory of the file and execute chmod 755 startLUCI.command
MacOS: text contents of the file “startLUCI.command”
#!/bin/bash
# example bash script to start multiple LUCI STUDIO instance with different lsup files
echo "Starting LUCI STUDIO Instances"
open -n "/Applications/LuciStudio.app" --args "~/Documents/LuciStudio-1.lsup"
open -n "/Applications/LuciStudio.app" --args "~/Documents/LuciStudio-2.lsup"
# copy more lines for more instances
Linux: text contents of the file “startLUCI.sh”
#!/bin/bash
# example bash script to start multiple LUCI STUDIO instance with different lsup files
# You can execute this file from the desktop when "double click on executable text files" is set to "run them"
# see Files -> preferences -> behaviour
# Alternativly create a desktop launcher file
echo "Starting LUCI STUDIO Instances"
~/"Technica Del Arte"/"LUCI Studio"/LuciStudio "~/Documents/LuciStudio-1.lsup" &
~/"Technica Del Arte"/"LUCI Studio"/LuciStudio "~/Documents/LuciStudio-2.lsup" &
# copy more lines for more instances
Things to consider when creating the different setup files:
- Use different server ports for the different instances.
- Use a different audio I/O for each instance. When using ASIO please be sure that the driver supports Multi Client ASIO to be able to open the audio channels with different applications.
- When you use SIP: Use unique SIP accounts for each instance and set a different RTP port for SIP in the Options/SIP-page. Note that all SIP identities need to be unique per instance.
- The name of the “lsup” file will be displayed as the window title to keep them apart. There is not much room so you need to keep the names small. Alternative you can define an unique instance name instead and even show it as a coloured tag ( See Ember+ )
- Do not copy a lsup file from another PC because credentials are scrambled. Use the Options->General->Backup/Restore tool instead to migrate lsup files from one PC to the other.
Note: When you start LUCI STUDIO from the windows menu instead from the instance files, then an instance will start with it’s own settings, so not with the instance files you made !