Since support for version 4.x is terminated and you can update for free to version 5 of LUCI Studio, here is a how-to migrating Luci Studio 4 to Version 5.
Just download and either install LUCI STUDIO 5 alongside LUCI Studio 4.x, or on a new PC (request a license reset). All settings and phonebooks are completely separated so there is no danger of contamination. If you want to use the same settings than you have to migrate them manually.
Also the activation code for Version 4 can be used to unlock Version 5. So there is no upgrade fee.
This manual shows how to migrate the LUCI Studio 4.x settings to LUCI STUDIO 5 , making you familiar with the new LUCI STUDIO 5 in the process.
If you have bought the Luci Studio 6 upgrade, the migration procedure is in principle the same.
Activation
Install LUCI STUDIO 5 with it’s installer, run it and it will start with the “Activation License” Dialog.
Now start “Luci Studio setup.exe” the usual way.
On the 1st page you’ll see the activation code you need to activate LUCI STUDIO 5. Copy the code and paste it in the proper field of “Activation License” Dialog. Also fill in the other required fields.
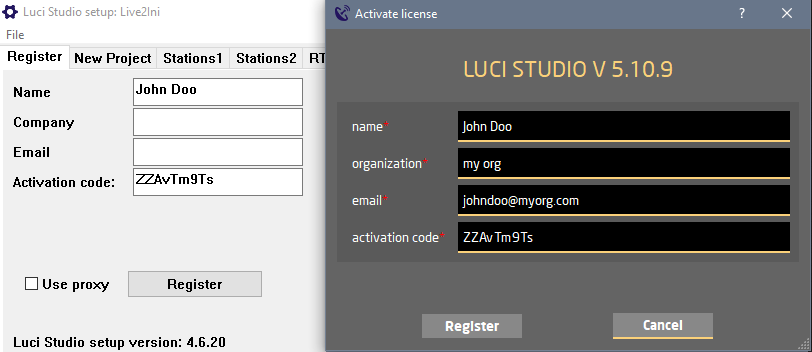 Press “Register” and wait for the “Registered !” message. LUCI STUDIO 5 is now fully activated. You can check it’s about screen for number of instances and other plugin-licenses.
Phonebook
All Phonebook files are compatible with LUCI STUDIO 5, so you can either load a backup copy in LUCI STUDIO 5 or export it first from Luci Studio 4.x.
In “Luci Studio Setup.exe” select “Export Station List (*.csv) ” . 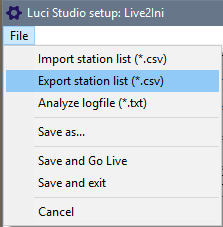 This will show a windows file saving dialog, were you can select the destination directory and filename of the phonebook file to save. As an example, choose the Documents Directory, and Type the filename “LS4 Stations“. Press “Save“.
In LUCI STUDIO 5 select “Add Phonebook” and “From a file” from the main menu.
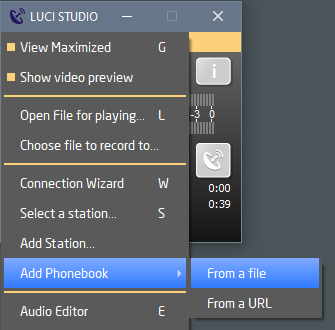 This again will show a windows dialog to select the phonebook file. To follow the example, choose the Documents directory and select the “LS4 Stations” file. Press “Open” and the stations will be added to the LUCI STUDIO 5 station list.
Settings
Al other settings have to be migrated manually, you can check the values in Luci Studio 4 setup and set them in LUCI STUDIO 5 :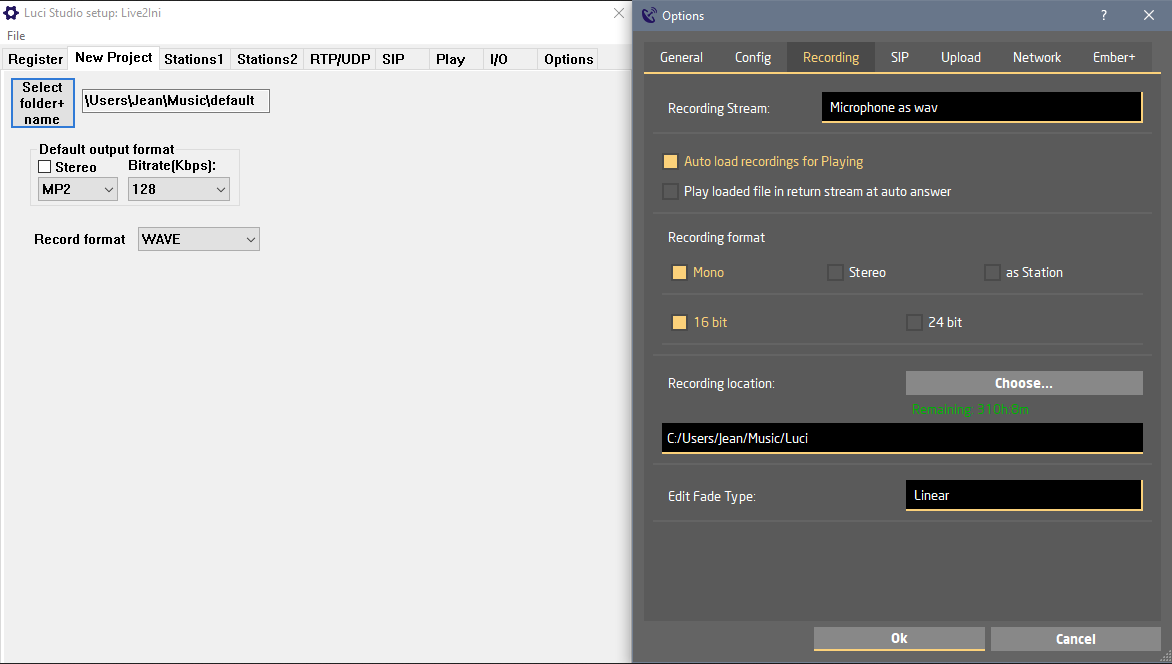 See following table for quickly find the settings:
| Luci Studio 4 setting | LUCI STUDIO 5 setting |
| New Project Select folder+name | Recording/Recording location / Choose …
and Menu/Choose File to Record to |
| Stations 1 | Select Station.. / Add/Edit Station.. |
| Stations 2 | Options -> Config ->Phonebook |
| RTP/UDP -> jitter buffer | Edit Station -> jitter/dyn. jitter buffer |
| RTP/UDP -> SIP RTP port | Options -> SIP -> RTP port |
| SIP -> defaults | Options -> SIP -> Identity |
| I/O | Select Audio I/O.. |
| Options | Options -> General |
| Options -> instances licensed | About -> Licensed Instances |
| Options -> Logging level | Options -> General -> Logging level |
| Options -> network interface | Options -> General -> Network Interface |
Note: Not all settings of Luci Studio 4 are implemented in LUCI STUDIO 5. If this setting is imperative to your usage of LUCI, please let us know so we can improve LUCI STUDIO 5 to your needs..