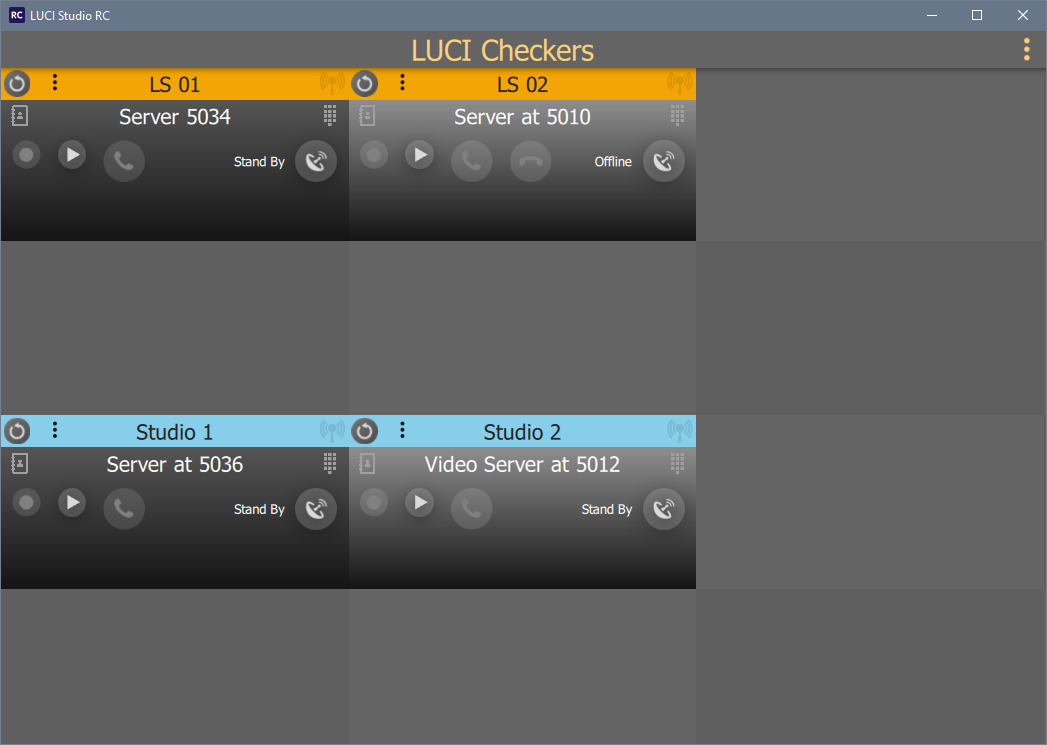
On start the main window is divided into 2 areas:
Menu Header area
![]() This area with the Text LUCI Checkers has a
This area with the Text LUCI Checkers has a ![]() button for the global setting menu:
button for the global setting menu:
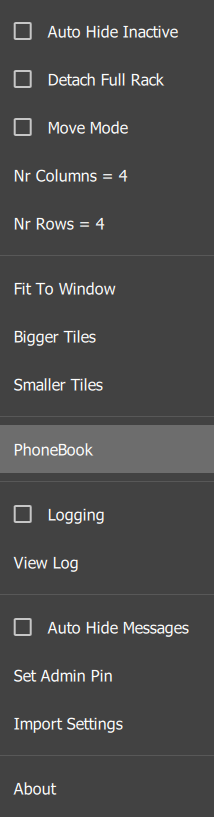
- Auto Hide Inactive: Will hide all LUCI STUDIO’s that are (temporarily) not online or connected.
- Detach Full Rack: Will show the full rack in a separate detached window.
- Move Mode: Switches the tiles into move mode, showing a Checkbox in the upper left corner.
 to select a tile to move, then clicking on an empty tile will move that LUCI STUDIO to that tile. More tiles can be selected and moved to the same relative tile position to the 1e selected tile.
 - Nr Columns/ Nr of Rows: For changing the number of rows or columns to your needs.
- Fit To Window: Scale tiles to exact fit in the main window.
- Bigger Tiles: Show instances tile 10% bigger.
- Smaller Tiles: Show instance tiles 10% smaller.
- PhoneBook: Load Phonebook Dialog
- Logging: Set Logging to a file on/off . The file is a “Comma separated File” ( Documents/luciremote-log.csv )
- View Log: Open the Log file with a appropriate application (like spreadsheet or plain text viewer)
- Auto hide messages: Information messages will automatically hide after 3 seconds.
- Set Admin Pin: You can set an Administrator Lock on certain operations to avoid faults by operator users. Just set a pin code of your choice that has to be entered when changing key features. You can remove the pin code lock by leaving the set the pin code empty.
- Import Settings: If you have multiple RC locations to guard the same LUCI STUDIO’s you can import their settings file here. The Settings file called “LUCI Studio RC.ini” is stored at the location “c:\Users\__USERNAME__\AppData\Roaming\TechnicaDelArte\”. You can copy it and import it at other RC locations with the Import Settings function.
- About: Information of this program and Activation details.
Instance viewing area
This scrollable area is a list of all connected LUCI STUDIO instances. Depending on which tiles are set to a LUCI STUDIO, you can leave tiles open for a beter overview.
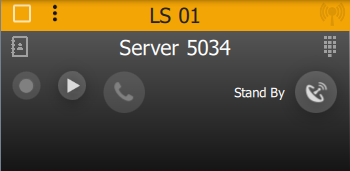
Per Tile there is:
- The Instance name in a group tag colored box
- Kind of reload button showing that the instance is running. Clicking this button will reconnect with the LUCI STUDIO instance, clearing possible loss of connection.
- The Station name or connection information
- A Phonebook selector button
- A direct SIP call selector button
- The Connect / Accept Call button
- The Disconnect / Reject Call button
- The Go-Live / Register button
- Last call information or connection quality information
- The Recording button and a Play file button.
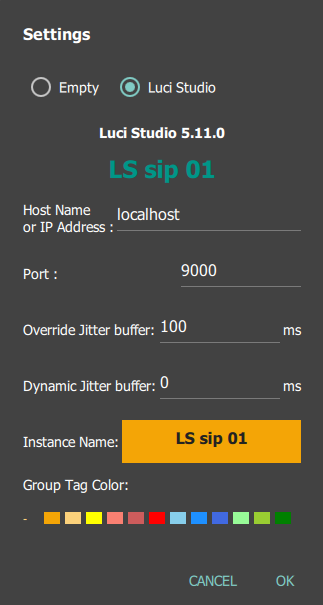
Instance Settings Dialog
Clicking on the Instance ember name will show the Settings dialog ( see Instance Settings page for more info ) :
Instance full Rack Dialog
Clicking on any other part of the tile will show the full instance rack with all available information :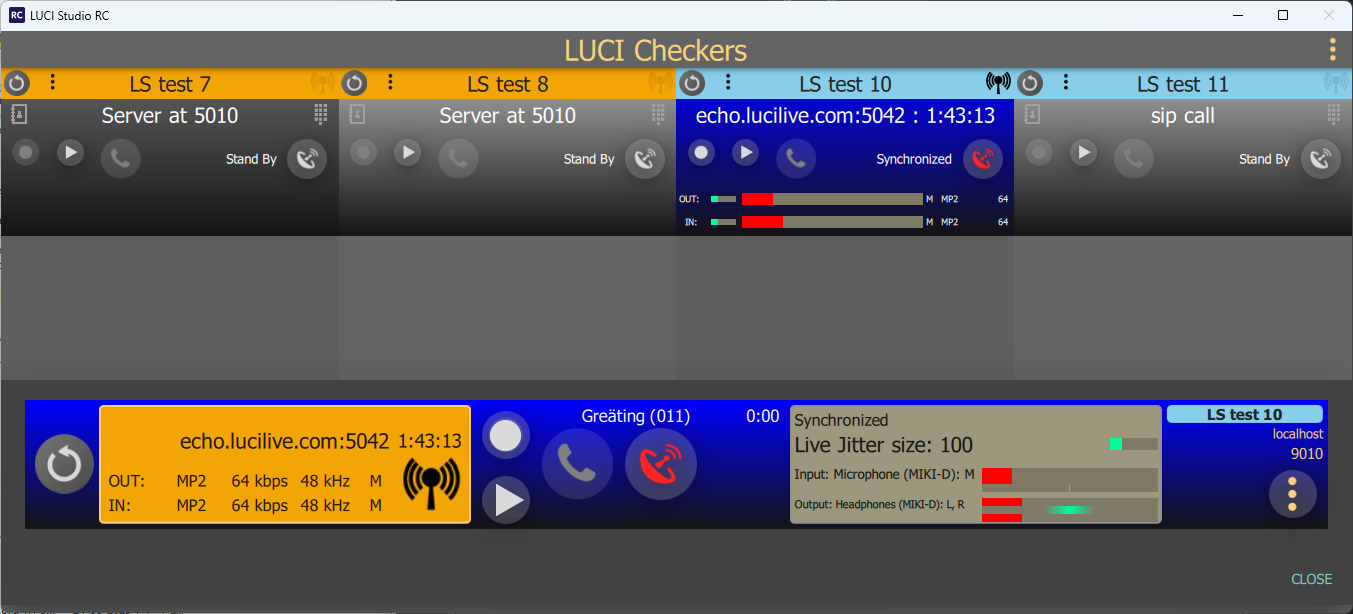
From left to right you will see:
- Kind of relaod button showing that the instance is running. Clicking this button will reconnect with the LUCI STUDIO instance, clearing possible loss of connection
- The Amber colored display with all information of the selected Station and Status.
- A Phonebook selector button
- A direct SIP call selector button
- The Connect / Accept Call button
- The Disconnect / Reject Call button
- The Register button
- The Recording button and a Play file button.
- The Grey Connection Info display with VU and jitter info
- The Instance name in a group tag colored box
- The IP or url of the LUCI STUDIO instance
- The port of the LUCI STUDIO instance
- The Instance settings menu button, for also accessing the instance settings dialog